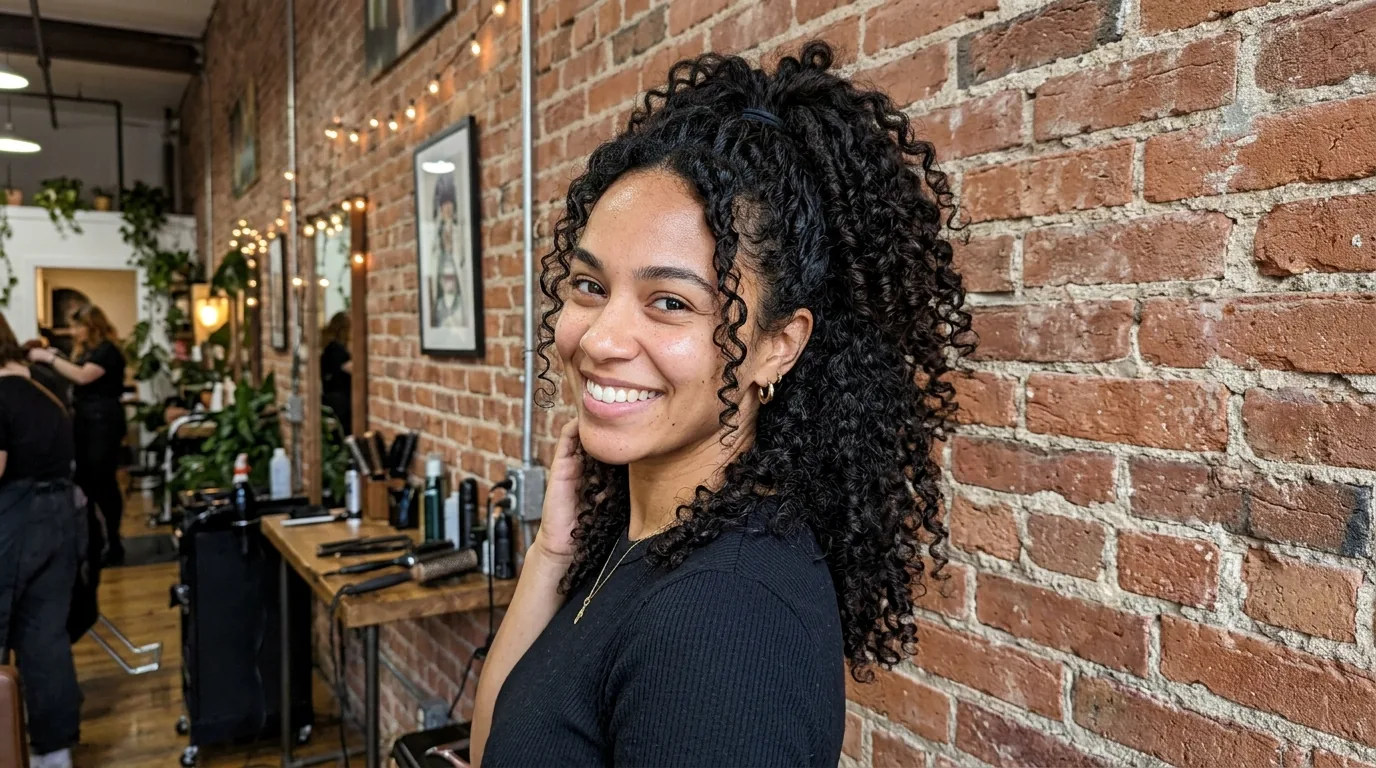
I used to think curly ponytails were my hair’s natural enemy. Every time I tried to pull my curls back, I’d end up looking like I’d stuck my finger in an electrical socket. The top would be smooth and sleek, then suddenly explode into a frizzy mess at the back. Sound familiar?
It took me three years and way too many bad hair days to realize I was doing everything wrong. The game-changer wasn’t expensive products or fancy techniques — it was understanding that curly ponytails follow completely different rules than straight hair.
Why Most Curly Ponytail Tutorials Are Lies

Let’s get one thing straight: 90% of curly ponytail tutorials on Pinterest were clearly written by someone with naturally straight hair. They tell you to “just scrunch and go” or “use a wide-tooth comb” — advice that would make any curly girl laugh (or cry).
The biggest myth? That you can create a perfect curly ponytail with wet hair. I tried this approach for months, thinking my curls would magically set in place. Instead, I got a saggy, stringy mess that looked worse as the day went on.
Here’s what actually works: Start with hair that’s about 80% dry and already has its curl pattern established. This means diffusing or air-drying first, then gathering. Revolutionary, I know.
The Height Game Changes Everything
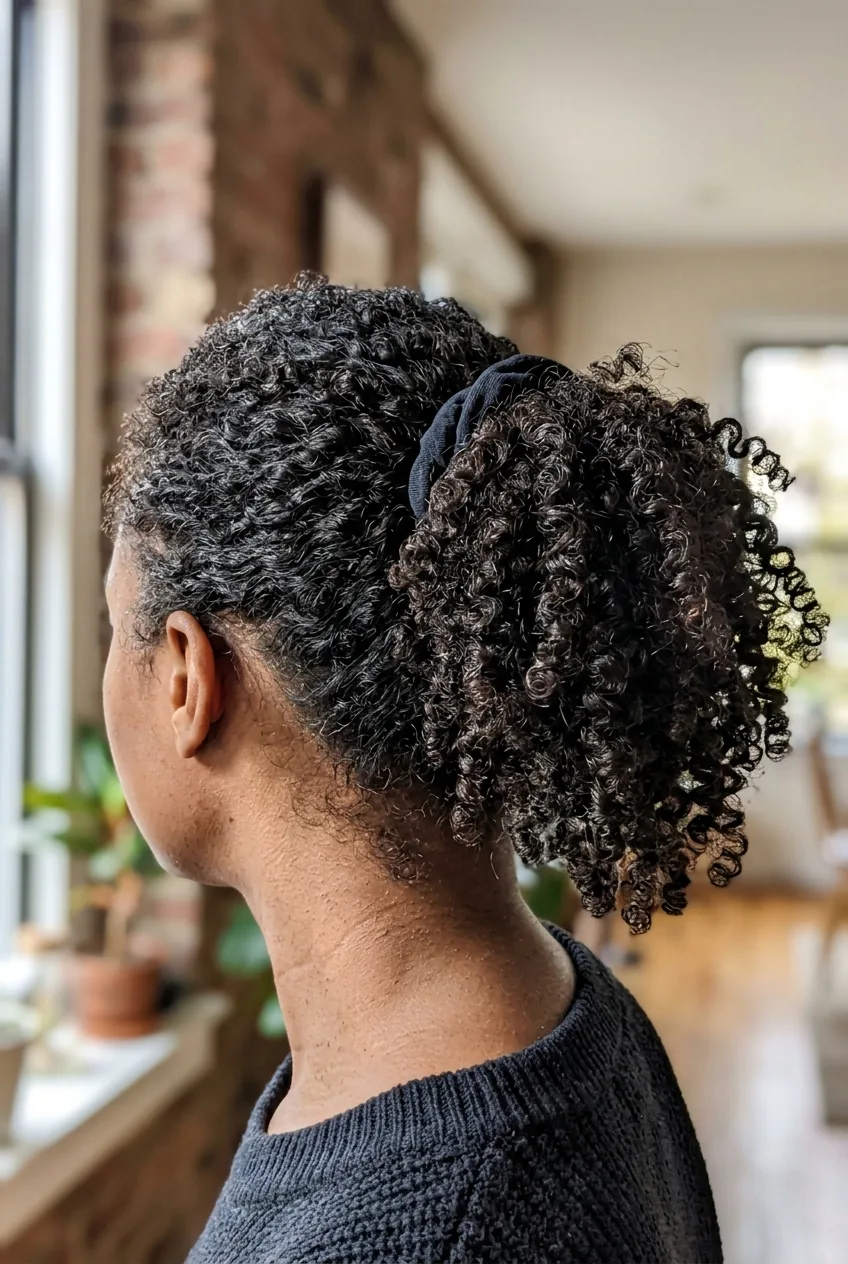
Where you place your ponytail makes or breaks the whole look. And here’s where it gets interesting — the “rules” for straight hair don’t apply to us.
- High ponytails: Great for adding volume, but only if you have thick, dense curls
- Mid-level: The sweet spot for most curl types — sits right at the ear level
- Low ponytails: Perfect for loose waves, disaster for tight coils
I spent years trying to recreate those sleek high ponytails I saw on Instagram, not realizing my 3B curls needed a completely different approach. Once I moved to mid-level placement, everything clicked.
My Controversial Take on Gel vs Cream
This might ruffle some feathers, but I’m team gel for ponytails. I know, I know — everyone preaches about cream for definition and moisture. But for holding power? Gel wins every time.
The trick is layering. I use a leave-in cream on damp hair for moisture, then seal everything with a strong-hold gel when I’m ready to style. Professional styling techniques have taught me that the application method matters more than the product itself.
“But gel makes my hair crunchy!” — Past Me, before I learned about scrunching out the crunch
Once your ponytail is set and dry, gently scrunch out any stiffness. You’ll keep the hold but lose the helmet hair effect.
This Technique Changed My Mind
The Prep Work Nobody Talks About
Want to know the real secret to gorgeous curly ponytails? It’s not what you do on ponytail day — it’s what you do the night before.
I sleep with my hair in a medusa clipping technique. Sounds fancy, but it’s just sectioning your curls into small pineapples all over your head with tiny claw clips. This prevents flat spots and maintains your curl pattern overnight.
Morning routine becomes so much easier when your curls still have their shape. A light mist with water, a touch of curl refreshing spray, and you’re ready to gather.
If you’re dealing with a similar hair journey, you might want to check out my thoughts on short curly cuts for natural curls — sometimes less length means more ponytail success.
Quick Fixes for When It All Goes Wrong
Let’s be real — even with perfect technique, some days your curls just won’t cooperate. Here’s my emergency toolkit:
The Frizz Halo: Dampen your hands slightly and smooth over the frizzy areas. Don’t touch the actual curls, just the flyaways.
Lopsided Volume: Gently tug at the hair around your crown to even things out. Work in small sections — you can always add more volume, but you can’t take it away.
Saggy Ponytail: This is where bobby pins become your best friend. Pin the elastic to the hair underneath for extra support.
Sometimes the best solution is embracing the imperfection. Those perfectly polished ponytails you see online? They’re often not realistic for daily wear anyway. I’d rather have a slightly messy but comfortable style that lasts all day.
The truth is, mastering curly ponytails is more about understanding your specific curl pattern than following generic advice. What works for my 3B spirals might not work for your 4A coils, and that’s completely normal. The key is experimenting until you find your sweet spot — then protecting that knowledge like it’s a family recipe.